-1.png?width=150&height=60&name=pixalate-full-logo%20(1)-1.png)
For Pixalate clients and users, please login to access this page with additional information.
Trafficking for DFP as Third party tracking tag

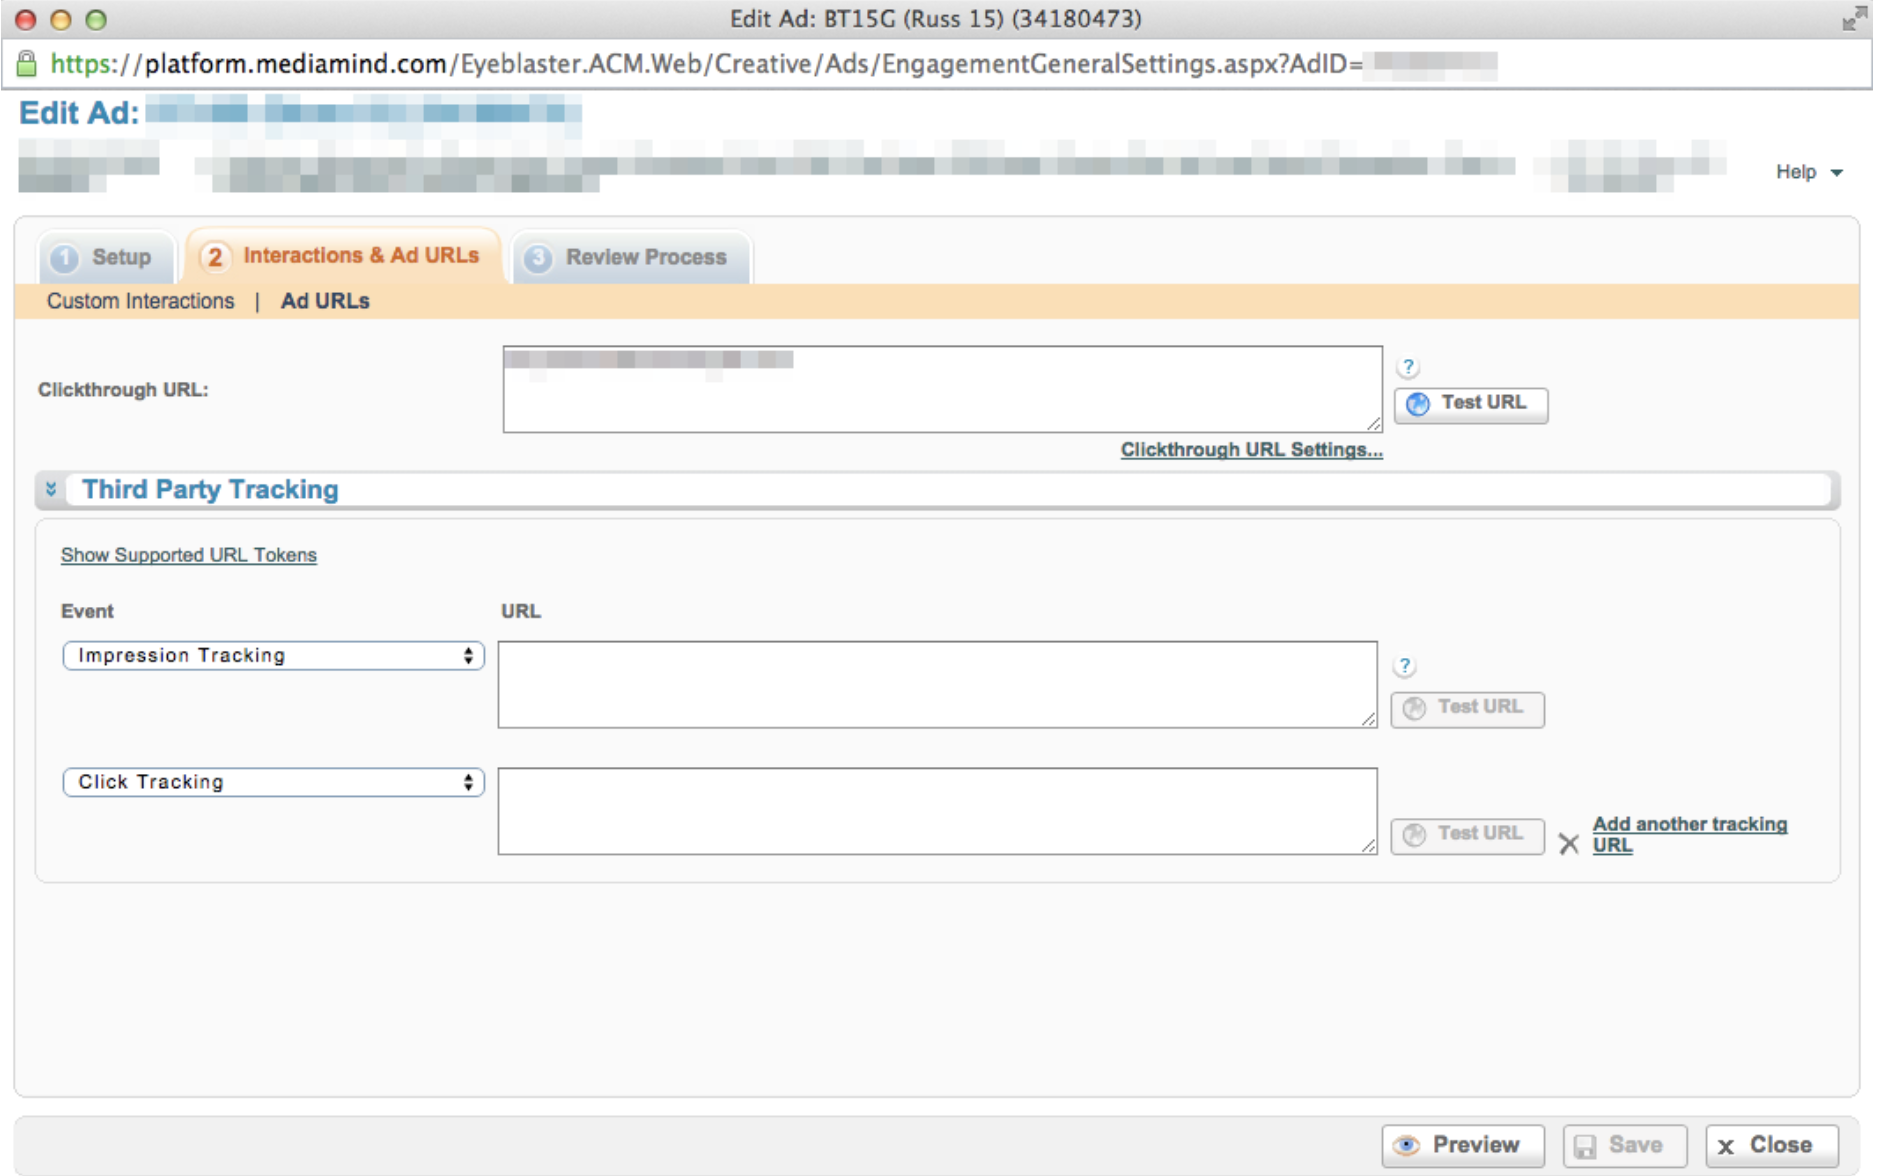
Trafficking for Sizmek
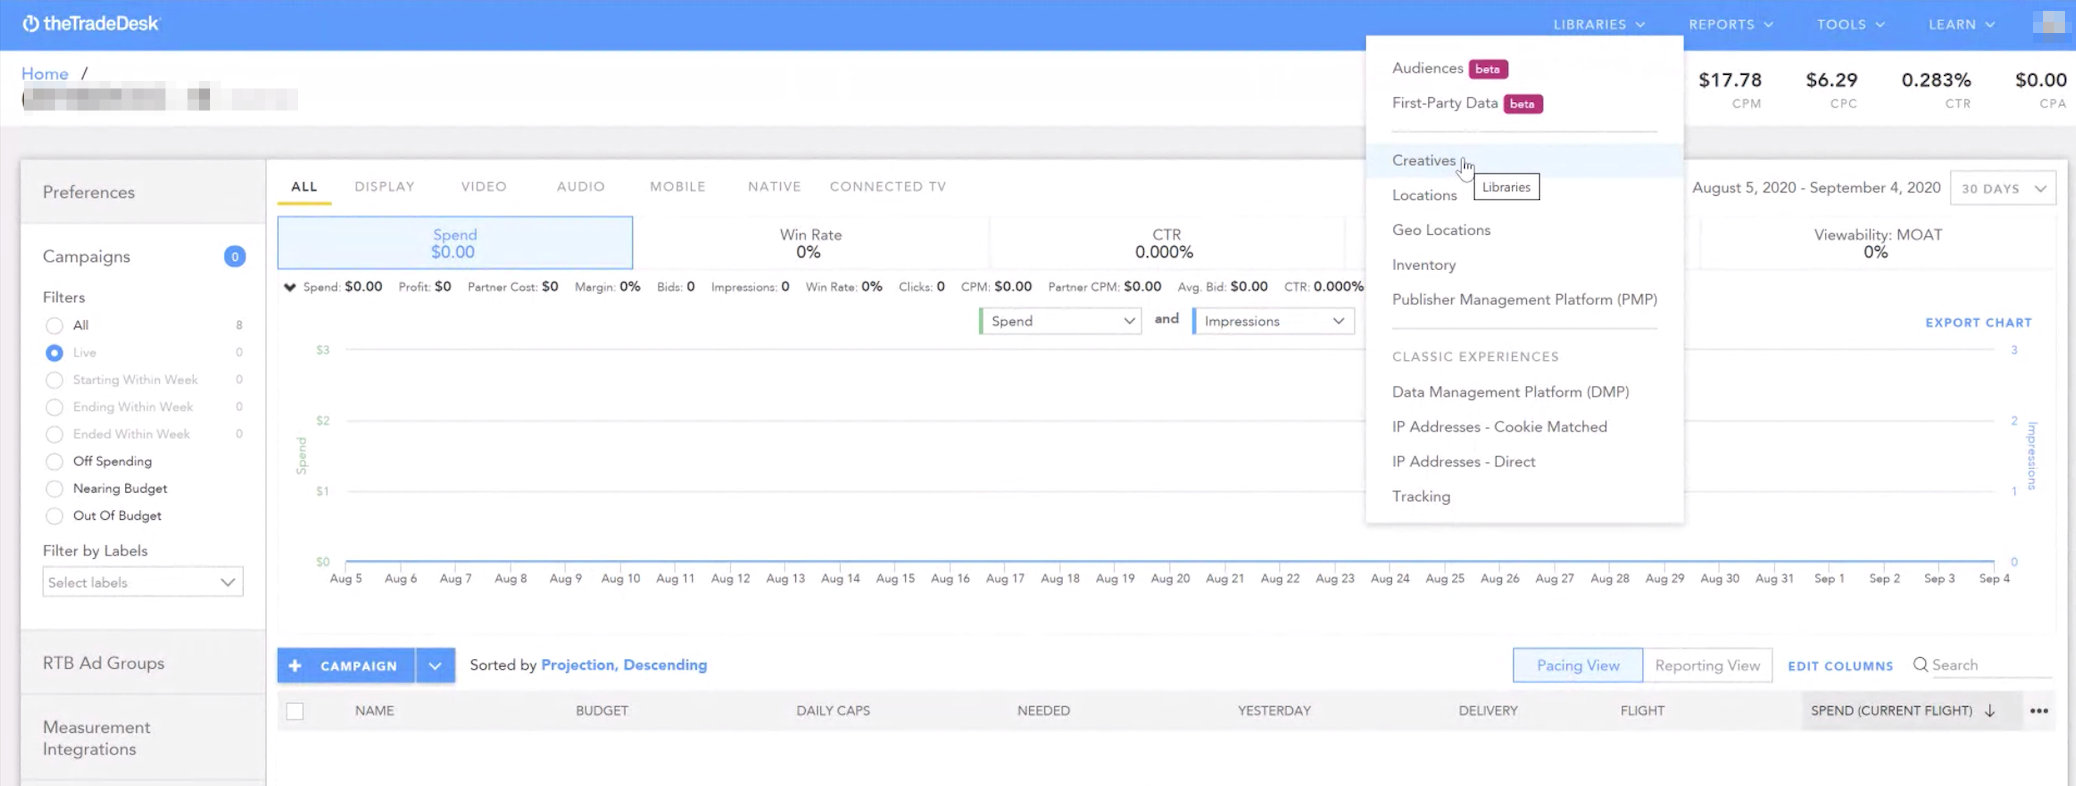
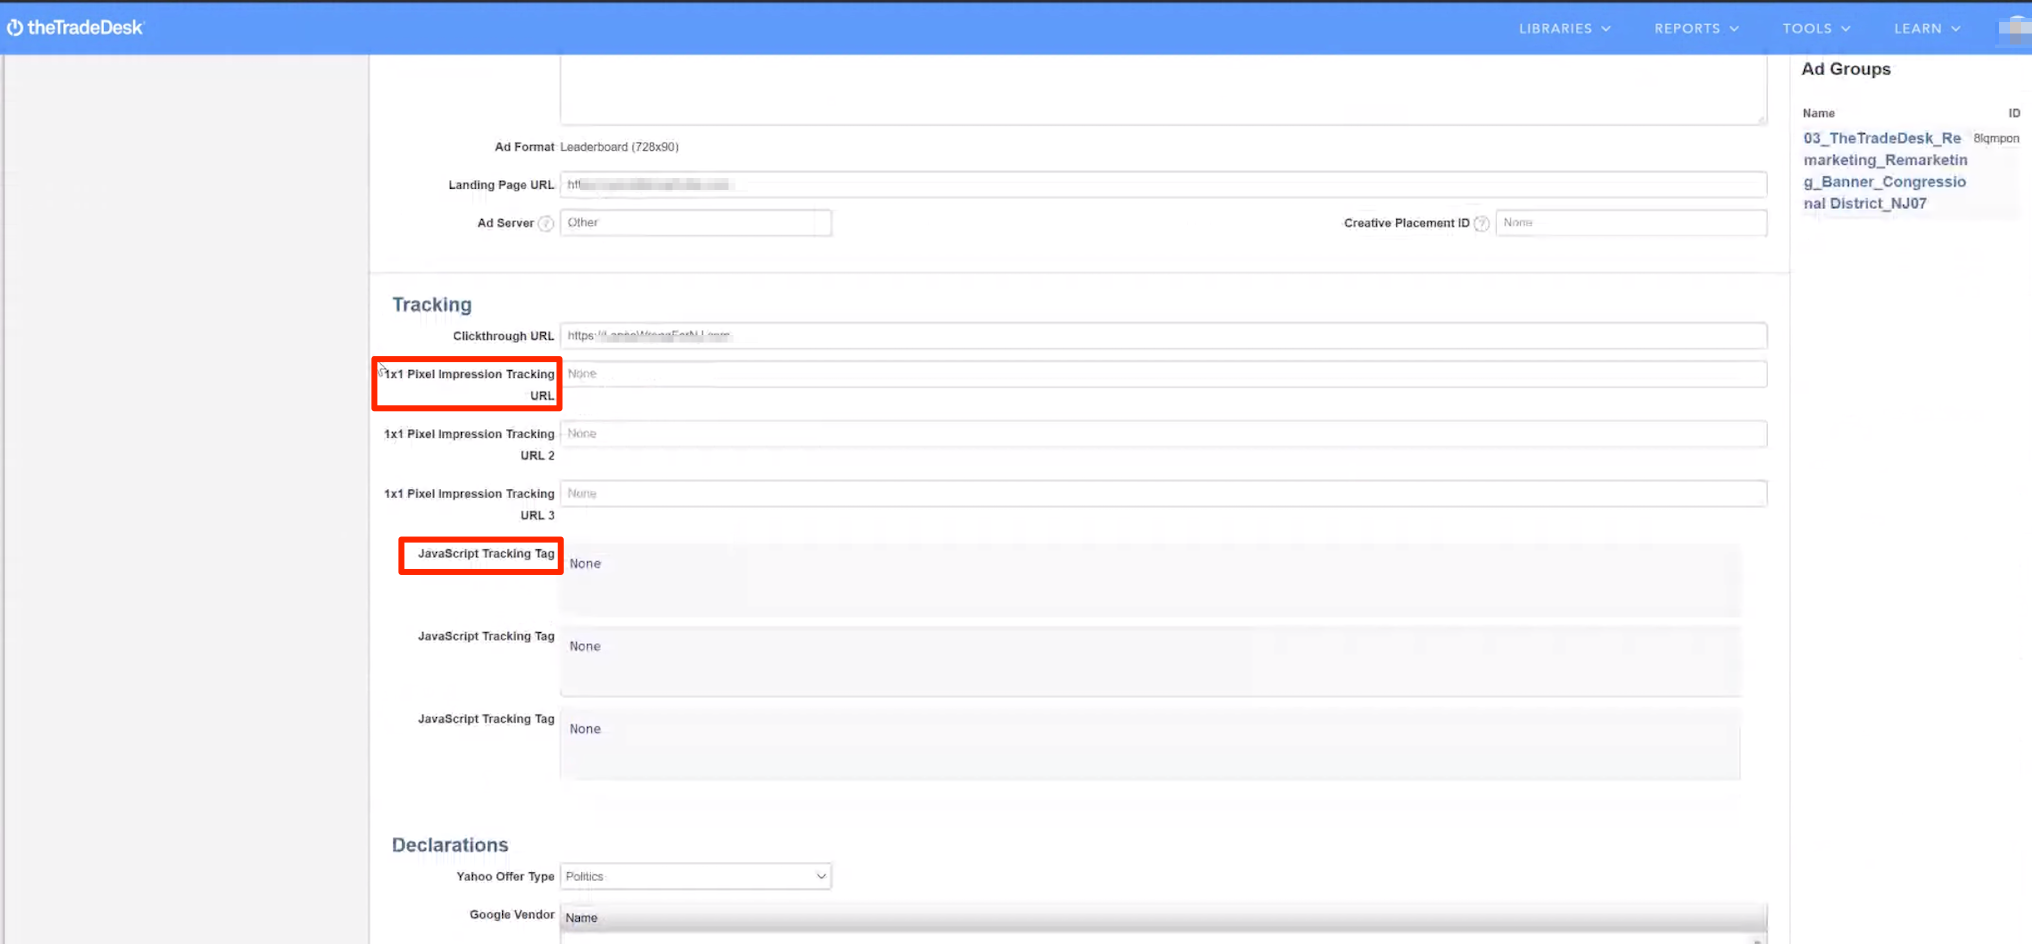
Trafficking TradeDesk (TTD)
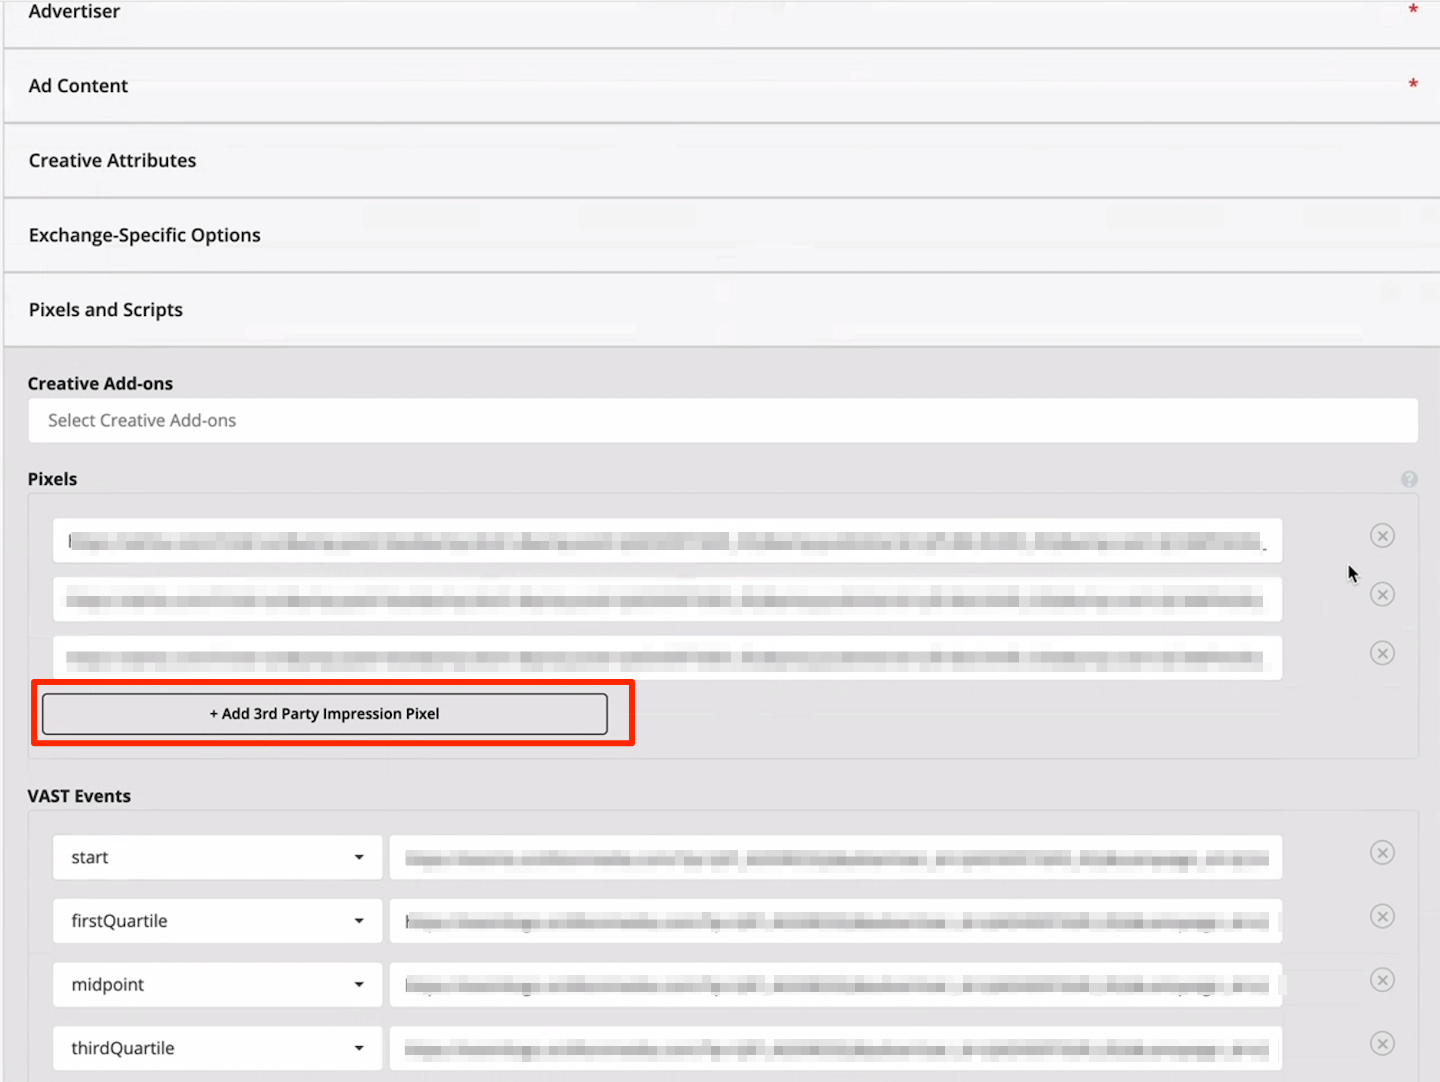
Trafficking in BeesWax (BWX)
Trafficking in DFP as creative wrapper (DFP/GAM)
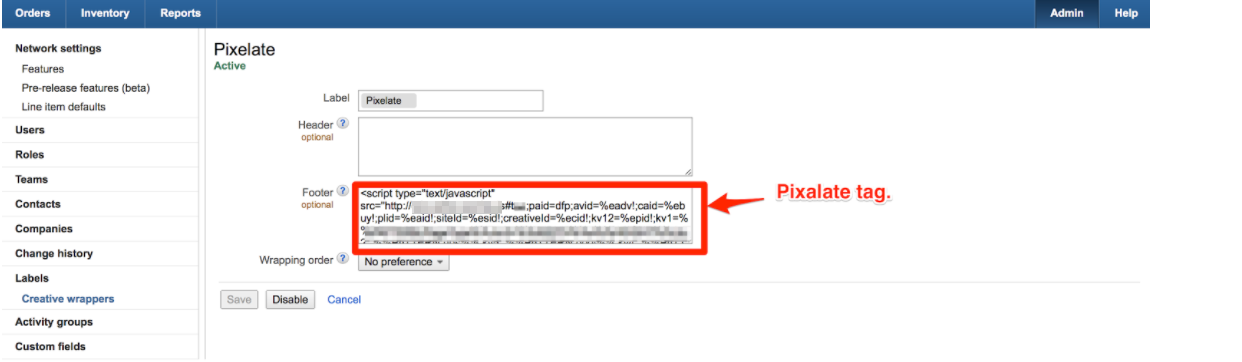
To traffic the Pixalate tag as a creative wrapper, please follow the steps below. For additional help how to add creative wrapper please follow the Google help link below;
https://support.google.com/dfp_premium/answer/2797762?hl=en
1. Login as an Admin and create a label Click New label.
- Enter a name for the label. The name can have up to 127 characters.
- Optional: Add a description of the label.
- Choose the label types for which this label can be used. You can choose one or more label types, or leave these blank and choose a type later.
- Click Save.
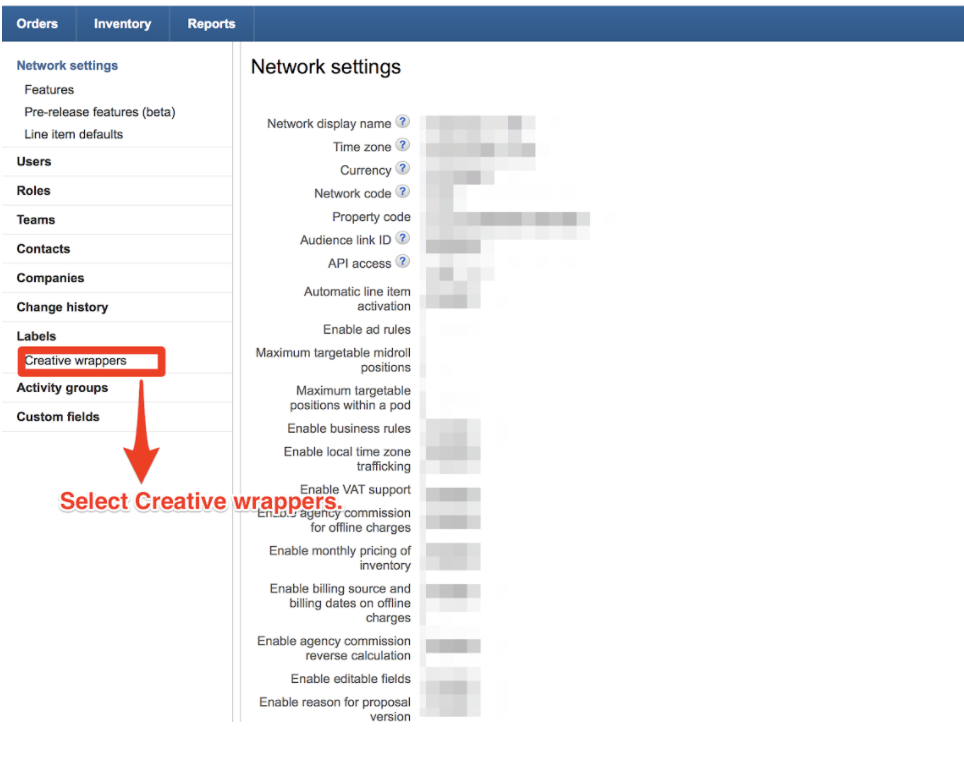
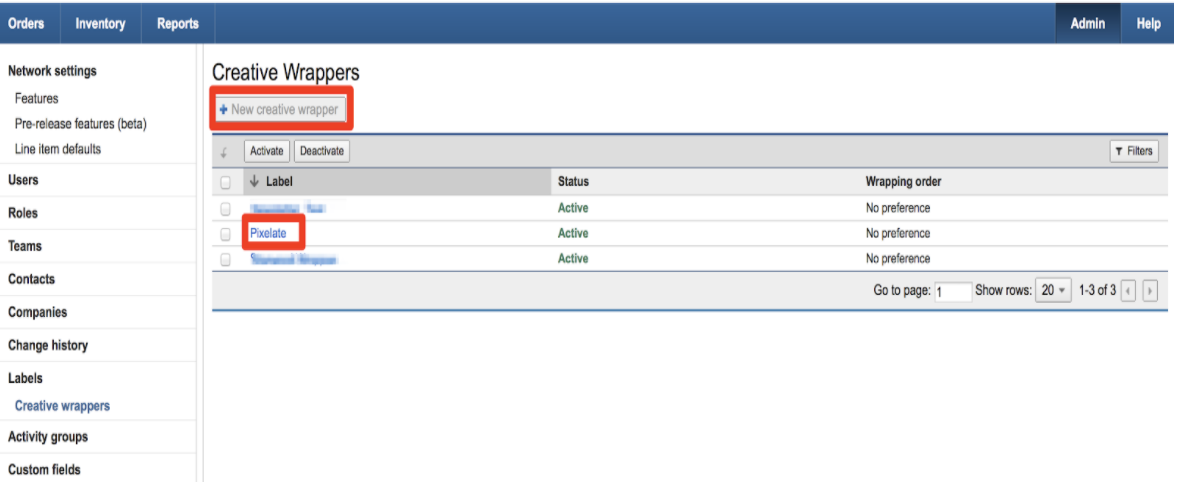
2. After creating the Label you can select the “Creative Wrapper” from the left panel and click on New creative wrapper.
GAM for small business (Free version with no wrapper option)
With the absence of creative wrappers, third-party tracking pixels can be added to the creatives using creative templates. There are two kinds of creative templates:
- Standard creative template: included in Ad Manager by default.
- Custom creative template: created for the network by an administrator or other technical resource.
Third-party tracking pixels can be added in either of these cases. Here's a Help Center article with more information.
Attached a sample creative template that can be used to traffic the tags. After importing into your network, you can use it to traffic a creative. In the creative settings, you'll see a text box, and you can add the snippet there.
- Go to Ad Manager > Delivery > Creatives > Creative templates
- Search and create a copy of the standard creative template: Image banner with optional third party tracking
- Open copied creative template and change name as desired
- Under Variable, click Add Variable and select Type as Text, Variable name as Wrapper Code and click Ok. Variables can define or enforce things like what kind of creative image files the template accepts, a third-party click tracking URL, or custom events
- In Code snippet, click Insert variable and select Wrapper Code. These variable placeholders will be replaced with the values defined by each trafficker when a creative is trafficked
- Click Save
DCM/GAM Custom macros (Pass Through Process)
Using DCM custom macros you can pull any value that is not available from DCM (e.g. App ID/Bundle ID, Device ID etc.) but it is available from other platforms like TTD.
Help Link: https://support.google.com/dcm/answer/2837907
The tag will go into dcm, you will have to "update" the dcm output tag by adding additional Trade Desk macros which will be piped into Pixalate tag in dcm. This is something DCM supports. Hence, the tag generation process will be two folds:
1) Generate the Pixalate Tag
2) Add new macros to DCM output tag
3) Traffic final tag into trade desk
If you can not access the help link, the details from the link are stated below;
Pass values to variables in Floodlight dynamic tags
Floodlight activity tags can contain a variety of variables that the advertiser's website populates dynamically when the Floodlight activity code is served. In some cases, you might want to include the same variables and values in the dynamic tags (default or publisher tags) that you've added to your Floodlight activity. To do so, you can use the %p pattern match macro.
You can use the Macro Builder tool to help you add macros to your ad tags.
About variables in Floodlight tags
There are two types of variables that are used in Floodlight tags:
- Standard variables: Floodlight tags include the standard variables u=, tran=, ord=, and num=.
- Custom variables: You can also choose to include custom Floodlight variables in any of your Floodlight activity tags. They take the form u1=, u2=, and so on.
Learn more about standard and custom variables
Examples of variables in Floodlight tags
Here's an example Floodlight sales tag before the variable values are inserted dynamically:
<iframe src="https://1234567.fls.doubleclick.net/activityi;src=1234567;type=type123;cat=cat1234;qty=1;cost=[Revenue];u1=[Product Category];ord=[OrderID]?" width="1" height="1" frameborder="0"></iframe> |
Let's focus just on the variables:
cost=[Revenue];u1=[Custom Variable 1];ord=[OrderID]? |
Here's what the variables look like once they've been populated with data by the advertiser's web server:
cost=19.95;u1=books;ord=BUY12834988? |
Use %p to pass variables and values to publisher and default tags. The %p macro captures any substring within a request path, then passes it in a redirect URL. The macro uses the following format:
%p[start_key_string]![end_character] |
Replace [start_key_string] with the key part of the key-value whose value you want to pass into the default or publisher tag. For example, if you're passing the value of the ord= key-value, the [start_key_string] is ord=. The[end_character] is typically a semicolon (;) to separate multiple key-values, or a question mark (?) to end the string. For example, the complete key-value to pass ord= would be order=%pord=!?.
Tag example
In this example, you're using a 1x1-pixel GIF tag for tracking purposes, and including the tag in your default tags.
Placeholder tag:
Here's the 1x1-pixel tag, with placeholders for the information you want to include:
<img src="https://www.mywebsite.com?price=[price]&category=[category]&order=[orderID]" height="1" width="1"/> |
Notice that you're creating new key-values. The new key can be anything you like (in this case, price, category, and order).
Tag with macros:
Using the %p macro, you replace the placeholders as follows:
<img src="https://www.mywebsite.com?price=%pcost=!;&category=%pu1=!;&order=%pord=!?" height="1" width="1"/> |
For each key-value, the value is %p, then the key part of the original key-value from the Floodlight tag, then an equals sign (=) and exclamation point (!). You can use this structure to import any key-value from the original Floodlight tag.
If it's the last key-value in the tag, end with a question mark (?). For other key-values, end with a semicolon (;). Notice that the original ampersand (&) separator remains in place. That's necessary because the question mark and semicolons are removed when the macros are expanded.
Tag with expanded macros:
When the macros are expanded, the new value is the original value of the key you referenced with the %p macro.
<img src="https://www.mywebsite.com?price=19.95&category=books&order=BUY12834988?" height="1" width="1"/> |
Example DCM Tag
If you want to pull App ID/Bundle ID and Device ID data the process will be as follows;
- Final tag to be traffic in TTD contains highlighted custom parameters defined as custom macros in DCM
<IFRAME SRC="https://ad.doubleclick.net/ddm/adi/Nxxxx.site-keyname/Byyyyyyy;sz=widthxheight;ord=[timestamp];dc_lat=N;dc_rdid=Czzzz;tag_for_child_directed_treatment=I;kw=[keyword];appId=[TD_AppID];deviceId=%%TTD_DEVICEID%%;click=?" WIDTH=X HEIGHT=Y MARGINWIDTH=0 MARGINHEIGHT=0 HSPACE=0 VSPACE=0 FRAMEBORDER=0 SCROLLING=no BORDERCOLOR='#000000'> |
- Pixalate tag to be trafficked in DCM with highlighted custom macros
Example Pixalate Tag In DCM Creatives (Sample)
<script type="text/javascript" src="{PIXALATE TRACKING TAG}"></script>
|
Ad Server Macros
Ad server macros representing the supply and demand partners must be provided in order to align data in Pixalate's dashboard with data represented in the ad server platform. Pixalate supports the following Supply and Demand ad server macros:
(Demand)
- Advertiser ID
- Campaign ID
- Line Item ID
- Creative ID
(Supply)
- Seller ID
- Publisher ID
- Placement ID
- Site ID
When passing Supply and Demand Ad Server macros, please keep the relationship of each in mind when mapping macros to Pixalate's assigned parameters in order to avoid confusion.
On the demand side, an Advertiser is considered the top account/client name. The following explains of a relationship of the demand side parameters:
An Advertiser (AdvertiserID) can run three different brand campaigns (CampaignIDs), where each campaign is runs three individual creatives/tags (creativeID).
As for the supply side, the Seller (SellerID) is the top account/partner name of the supplier. The following explains of a relationship of the supply side parameters:
A Seller (SellerID) can work with 10 different publishers (PublisherIDs), each may own 10 individual websites (SiteIDs). Every page of the websites contains 3 separate ad slots/placements (placementIDs).
Supply Types
Pixalate recommends a supply type value be provided for the kv24 key parameter which represents whether or not the placement is display, video, or native, running on desktop, mobile web, mobile app, or CTV. A macro can be used to dynamically populate this value when an ad is served. If a macro is not available, Pixalate suggests that tags are duplicated for each supported supply type with a hard coded value, then trafficked accordingly to the corresponding supply type.
Acceptable hardcoded KV24 values include:
-
Desktop
-
Desktop_Video
-
Desktop_Native
-
Mobile_Web
-
Mobile_Web_Video
-
Mobile_Web_Native
-
Mobile_InApp
-
Mobile_InApp_Video
-
Mobile_InApp_Native
- CTV_InApp_Video
-
Email_Display
-
Email_Video
- Desktop_Native
- Mobile_Web_Native
- Mobile_InApp_Native